Exit Tickets – Key Feedback from Students and Teachers

Using an exit ticket is a common form of formative assessment used with students to gain some insight into what students learned or understood from a particular lesson.  This is also a great tool to use with adult students.

After each technology training that I have conducted this year with my teachers, I have asked them to complete an “Exit Ticket” about their learning experience.  The tool I chose for this format is Google Forms.  It was easy to set up, quick for them to complete in a user friendly format, and I love how I instantly get the results in a nice organized spreadsheet!  I look at this feedback after training to determine how comfortable the staff was with the topic of the session, any instant things/misconceptions needed to be addressed, and reflect on how I would change the training the next time offered.

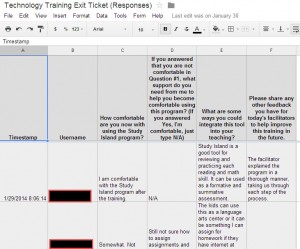
Below is a screenshot of the feedback responses from one of my technology PD sessions this year.

Technology Exit Ticket I


The Tech Integrator

Start students young creating Presentations

1st Grade is a great time to have students starting to create presentations of their own using technology.  Start simple, but get them using the tech and learning the skills to create great presentations with text and visuals.

I did a lesson with my first graders using Power Point.  It was simple, they made one slide, but it gave them a foundation to build upon for future years.  This can be applied to any content area, and you can have them pre-write their sentences and check for punctuation and spelling.  Try it, you will be amazed at what they can do at that age.


Til Next Time…

The Tech Integrator

Google Spreadsheet Tips Part II – Protecting Cells

When working on a spreadsheet with others, you may want them to be able to edit the sheet but wish there were certain cells within the sheet that you could lock down, or protect from being edited.  There is a way to do this!  Follow these steps:

1.  Highlight the cells/columns you wish to protect.
2.  Right click and choose Name and protect range.
3.  A panel will open confirming your cell range – check the Protect box.
4.  Choosing a name for your range will make it easier for you to find and manage protected cell ranges
5.  Click Done.

Once you have protected your cells, any collaborators on the document will see the cell data but will be unable to edit the cell.

Special Thanks to Sheryl Roberts for her contribution to this post.

The Tech Integrator